Magnetics
Theory
Magnetic surveys are used to identify sub-surface structures, which have considerable magnetization (induced or, more importantly, remanent magnetisation). Examples of such structures are magmatic or metamorphic rocks containing magnetite (e.g. basalt, granite, gabbro, …) or man-made objects as metal artefacts (farming, ammunition) or burned loam (archaeology).
Magnetic surveys measure the strength and the direction of the Earth’s magnetic induction \(\vec{B}\) [nT], either as magnitude \(T\) [nT] and inclination \(I\) [\(^{\circ}\)] and declination \(D\) [\(^{\circ}\)], or as the three components \(B_x\), \(B_y\), and \(B_z\) [nT].
There are several types of magnetometers: Fluxgate magnetometers measure one of the components of the magnetic induction, mostly the vertical component Bz. Proton precession magnetometers measure the magnitude of the total magnetic field, \(T\).
For further details, see script of lecture Angewandte Geophysik II from Georg Kaufmann.
Material properties
Magnetisation \(\vec{M}\) [A/m],
defined as the ratio of magnetic dipole moment \(\vec{m}\) [Am\(^2\)] and volume \(V\) [m\(^3\)]:
\(\vec{M} = \frac{\displaystyle m}{\displaystyle V}\).
While the definition looks similar to our definition of density, we note that in the case of magnetization we already use the concept of a model, the dipole moment, representing the sub-surface. The magnetization as material properties can have two causes:
an external magnetic field of strength \(H\) [A/m] induces electric currents in the material, which in turn create a magnetic field. Here, \(H\) can be regared as the Earth’s magnetic field. This sort of magnetization is only present, when the external field is present, and thus is called induced magnetization \(\vec{M}i\).
The second cause is the intrinsic property of materials, with the electron spin creating a magnetic field. This magnetization will also remain without external field, and thus is called remanent magnetization \(\vec{M}r\).
Both induced and remanent magnetization add up to the total magnetization: \(\vec{M} = \vec{M}i + \vec{M}r\)
Instrument(s)
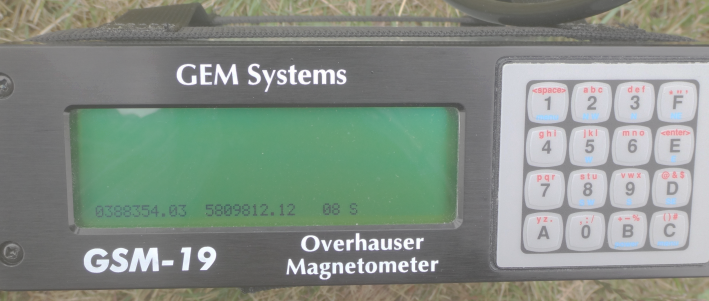
GEM-Systems GSM-19: The GSM-19TW from GEM Systems is an Overhauser proton precession magnetometer. It is shipped with a console, two sensors, a GPS antenna, several rods for assembly either as measuring pole or on a backpack frame, and a set of connecting cables.
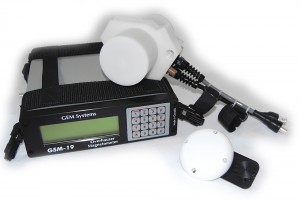
GSM-19, photo GEM-Systems
Assembly
Important: Handle with extreme care!
The GSM-19 is equipped with two sensors and a GPS antenna. The GPs antenna cable has a small yellow ring. The sensors cables are twin cables each, with a black and a gray cable.
The poles can be used as hand-held pole or mounted to the backpack.
For hand-held poles, use the base pole (rubber end) as start, then attach other poles, together with sensors in desired heights.
For backpack mounting, fix a pole on the rack, then a sensor.
as final assemblage, fix the GPS antenna to the top of the pole construction.
connect the cables to the sensors, to the GPS antenna, and the other side to the GSM-19 logger (plugs are labelled).
Note: The GSM-19 can be used with single sensor or with two sensors. If the two-sensor setup is chosen, be careful to connect the lower sensor to the correct plug on the GSM-19 device (lower).
Configuration
Important: We use the GSM-19 to walk along pathways or profiles. This usage is described here, for other (re.g. raster) surveys consult the user manual.
Swith the unit on by pressing B. The main screen is displayed.
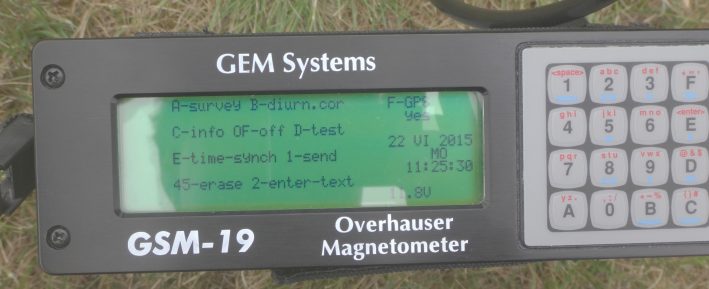
Main screen
Erase all data from the previous survey by pressing 4 and 5 simultaneously. The unit asks for confimation, press e and r simultaneously.
By pressing A, the survey mode is activated. If this option is chosen right after booting the unit, the GPS signal is searched for:
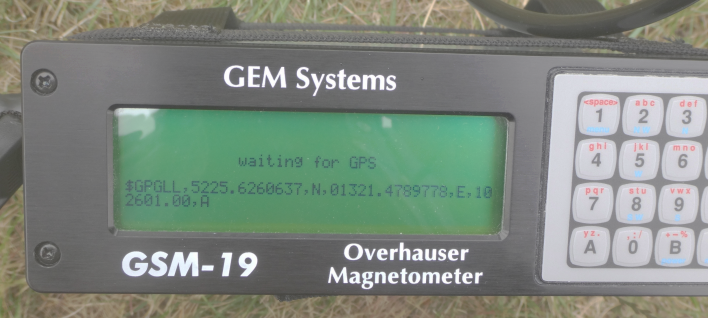
GPS search
Once enough GPS satellites are found, the unit is ready for survey and displays the following screen:
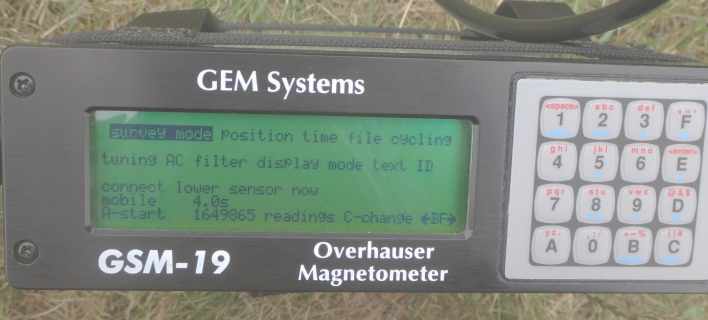
Note that the unit displays mobile as survey mode. This option is kept from the previous use. To change the operation mode, press C-change, then toogle to the correct mode with the B or F-buttons, then save with C.
Field measurement
Start the survey by pressing A. The unit now shows UTM coordinates in the lower line, and the number of satellites seen.
GPS search
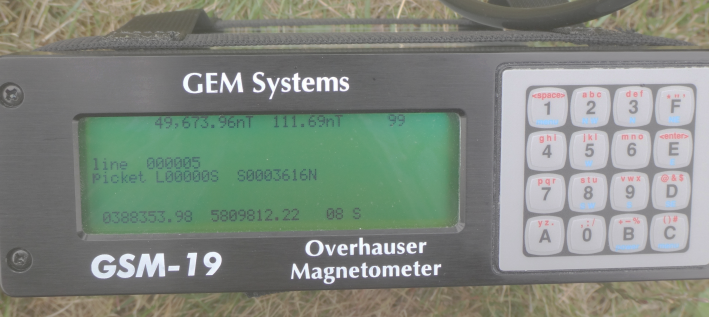
We now move from point to point and make a measurement by pressing any key. After pressing any key, the unit takes makes a measurement cycle. After the successful cycle, the measurment is displayed. In the top line, the total-field value (in nT) is displayed, the difference of this value to the previous point (in nT), and a quality factor. Here, the first digit from 0-9 shows whether the time necessary for a quality reading has been reached. The higher the better. The second digit ranging form 0-9 provides data for the reliability of the measurement – the higher the better. “99” is a HQ measurement.
GPS search
Once the profile is mapped out, press 1 and C simultaneously to end recording.
Data download
Download of the data is done with the GEM-Systems software GEMLink.
Attach the GSM-19 to the serial port (via a serial-to-usb converter), start the GEMLink software. The port should be identified automatically.
From the GSM-19 unit, press
1-send, then chooseDfor default format. The data sould now be transferred to the laptop.Save the transferred data to a file.
Post processing
Important: Use GRAViMAG web interface for processing data!
The data exported from the GSM-19 unit with GEMLink can be directly
imported into GRAViMAG. NOTE: Sometimes you need to check the
exported data file, there should be no empty line(s) at the start of
the file.
