This guide is about key-based logins to remote Unix/Linux-servers from a Windows PC using PuTTY. If you have OpenSSH on your Windows, Mac or Linux computer, things should be a lot easier and you can type commands directly in a Terminal window.
Preparation
Make sure that PuTTY is available on your computer. This guide uses the following 3 programs: PUTTY.EXE, PUTTYGEN.EXE, PAGENT.EXE.
In case they are not installed or you run into problems, they can simply be extracted from the ZIP archive and run directly (no formal installation or admin account necessary).

Key Generation
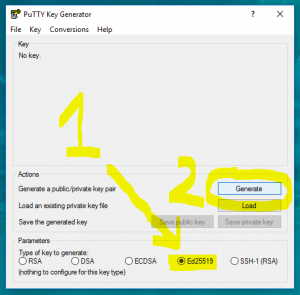
Start PUTTYGEN to generate an SSH key.
Select Ed25519 as the type of key in the “Parameters” section for a modern key format that will give you a smaller public key string which will be easier to copy and paste later. Then click on the Generate button.
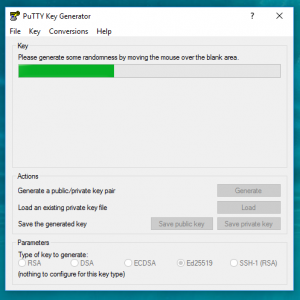
Move your mouse around a bit to generate better randomness while the key is generated.
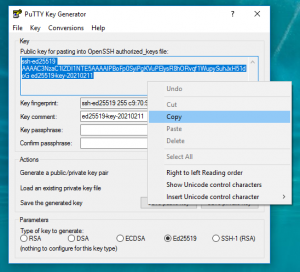
When the key genartion is done, select the public part on the top and copy it to the clipboard. To do so, you can right click on the public key, then chose Select all and then right click again and chose Copy.
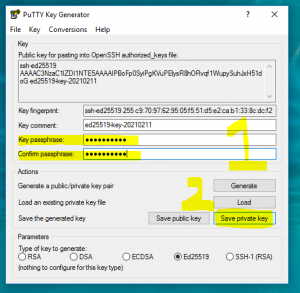
Type in a passphrase for your new key to protect it and then click on Save private key to save your key file in a location only you personally have access to.
You can close the “PuTTY Key Generator” window now.
Getting the Key to the Server
To get the public key to the server, you will need to log on using your regular credentials one last time.
Start PUTTY to establish an interactive connection to the server. If you are connecting for the first time, it is probably a good idea to create and save a session now, so that you won’t have to type in the server name again and again later on. Type in the server name in the Host Name field and some name for the session (you can use the server-name here as well or make something up).
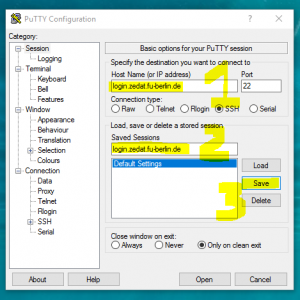
Select the session you want and click on Open to initiate the connection. Note that when you connect to a server for the first time, you need to verify (if you want) and save the remote server’s SSH fingerprint.
Log in with your regular username and password. Using the shell, create a .ssh directory on the server if it does not exist yet:
mkdir .ssh
Then create (or edit) the authorized_keys file within that directory:
pico .ssh/authorized_keys
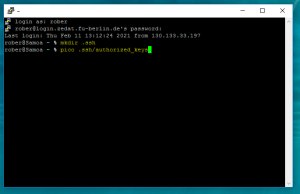
You can use any editor that you are comfortable with on the remove server. A very simple one is called “pico”. When inside the editor, right-click to paste the contents of your clipboard. Note that if your public key is not in your clipboard anymore for some reason or another, and you are thus unable to paste it into the editor, you can open just PUTTYGEN again, load your key and copy the public part to the clipboard again (see above).
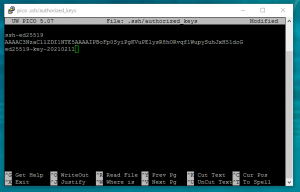
Important: Remove the line-breaks. There should be only spaces between the three parts of your key.

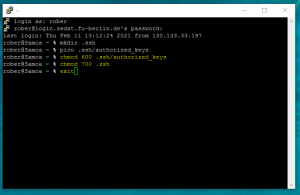
Save the file and exit the editor. For the pico editor you can use [Ctrl]+[o] to save and [Ctrl]+[x] to exit. For extra safety you can make sure that both the file and the directory are readable for your user on the remote server only:
chmod 600 .ssh/authorized_keys
chmod 700 .ssh
You can then exit the SSH session.
Logging in using SSH Keys and Agent
PAGENT can be used to keep track of your SSH keys and supply them to PuTTY for logins.
The idea is to have the agent process running in the background (in the Windows system tray), so that you only need to unlock your SSH key once using the previously set passphrase, and the agent will keep it (or multiple such keys) in memory and automatically use them to authenticate you when necessary. Some people put PAGENT in their “Startup” folder, others just start it on demand before making the connection with PuTTY.
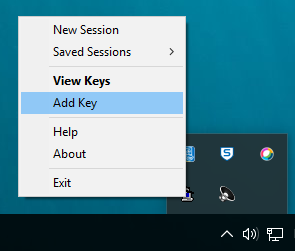
Start PAGENT by double-clicking it, and it should automatically appaer in your system tray (usually to the bottom right somewhere next to the date and time). Using a right click, you can add and remove SSH keys. Try doing this with your newly generated key now.
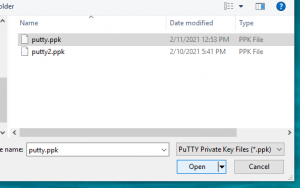
Select your SSH keyfile and Open it.
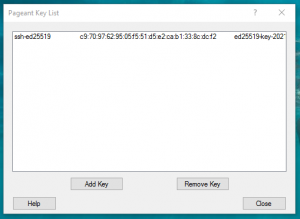
You can also right-click on the icon in the task bar again to View all loaded SSH keys.
While most of the above steps only need to be done once, this is where daily routine starts.
Now let’s start PUTTY and open a connection to the server again.
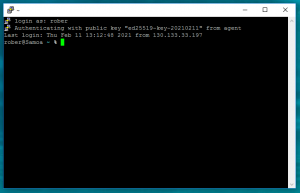
Enter your login name and press the return key. You should be authenticated automatically using your SSH key.
Leave a Reply